Windows Subsystem for LinuxSetting Up WSL and the Windows Terminal
This demo is for Windows users only.
This demonstration explains how to install and set up Windows Subsystem for Linux (WSL) 2 with the latest Ubuntu distribution, as well as the Windows Terminal app.
Before You Begin: Ensure that no Windows updates are downloading or waiting to be installed on restart. If there are updates waiting, deal with them before proceeding.
Requirements: To proceed, your system must meet the following minimum requirements:
- Windows 10, version 2004 or higher (Build 19041 or higher), or Windows 11.
To check your version:
- Press
Windows key + R, typewinver, and press Enter. - Update your system if needed by navigating to:
Start > Settings > Windows Update > Check for updates.
If your system does not meet these requirements and cannot be updated, consult your instructor for assistance.
Step 1. Install the Windows Terminal App
- Open the Microsoft Store.
- Search for Windows Terminal, select it, and click Install.
- Once installed, launch the app as shown in Figure 1.
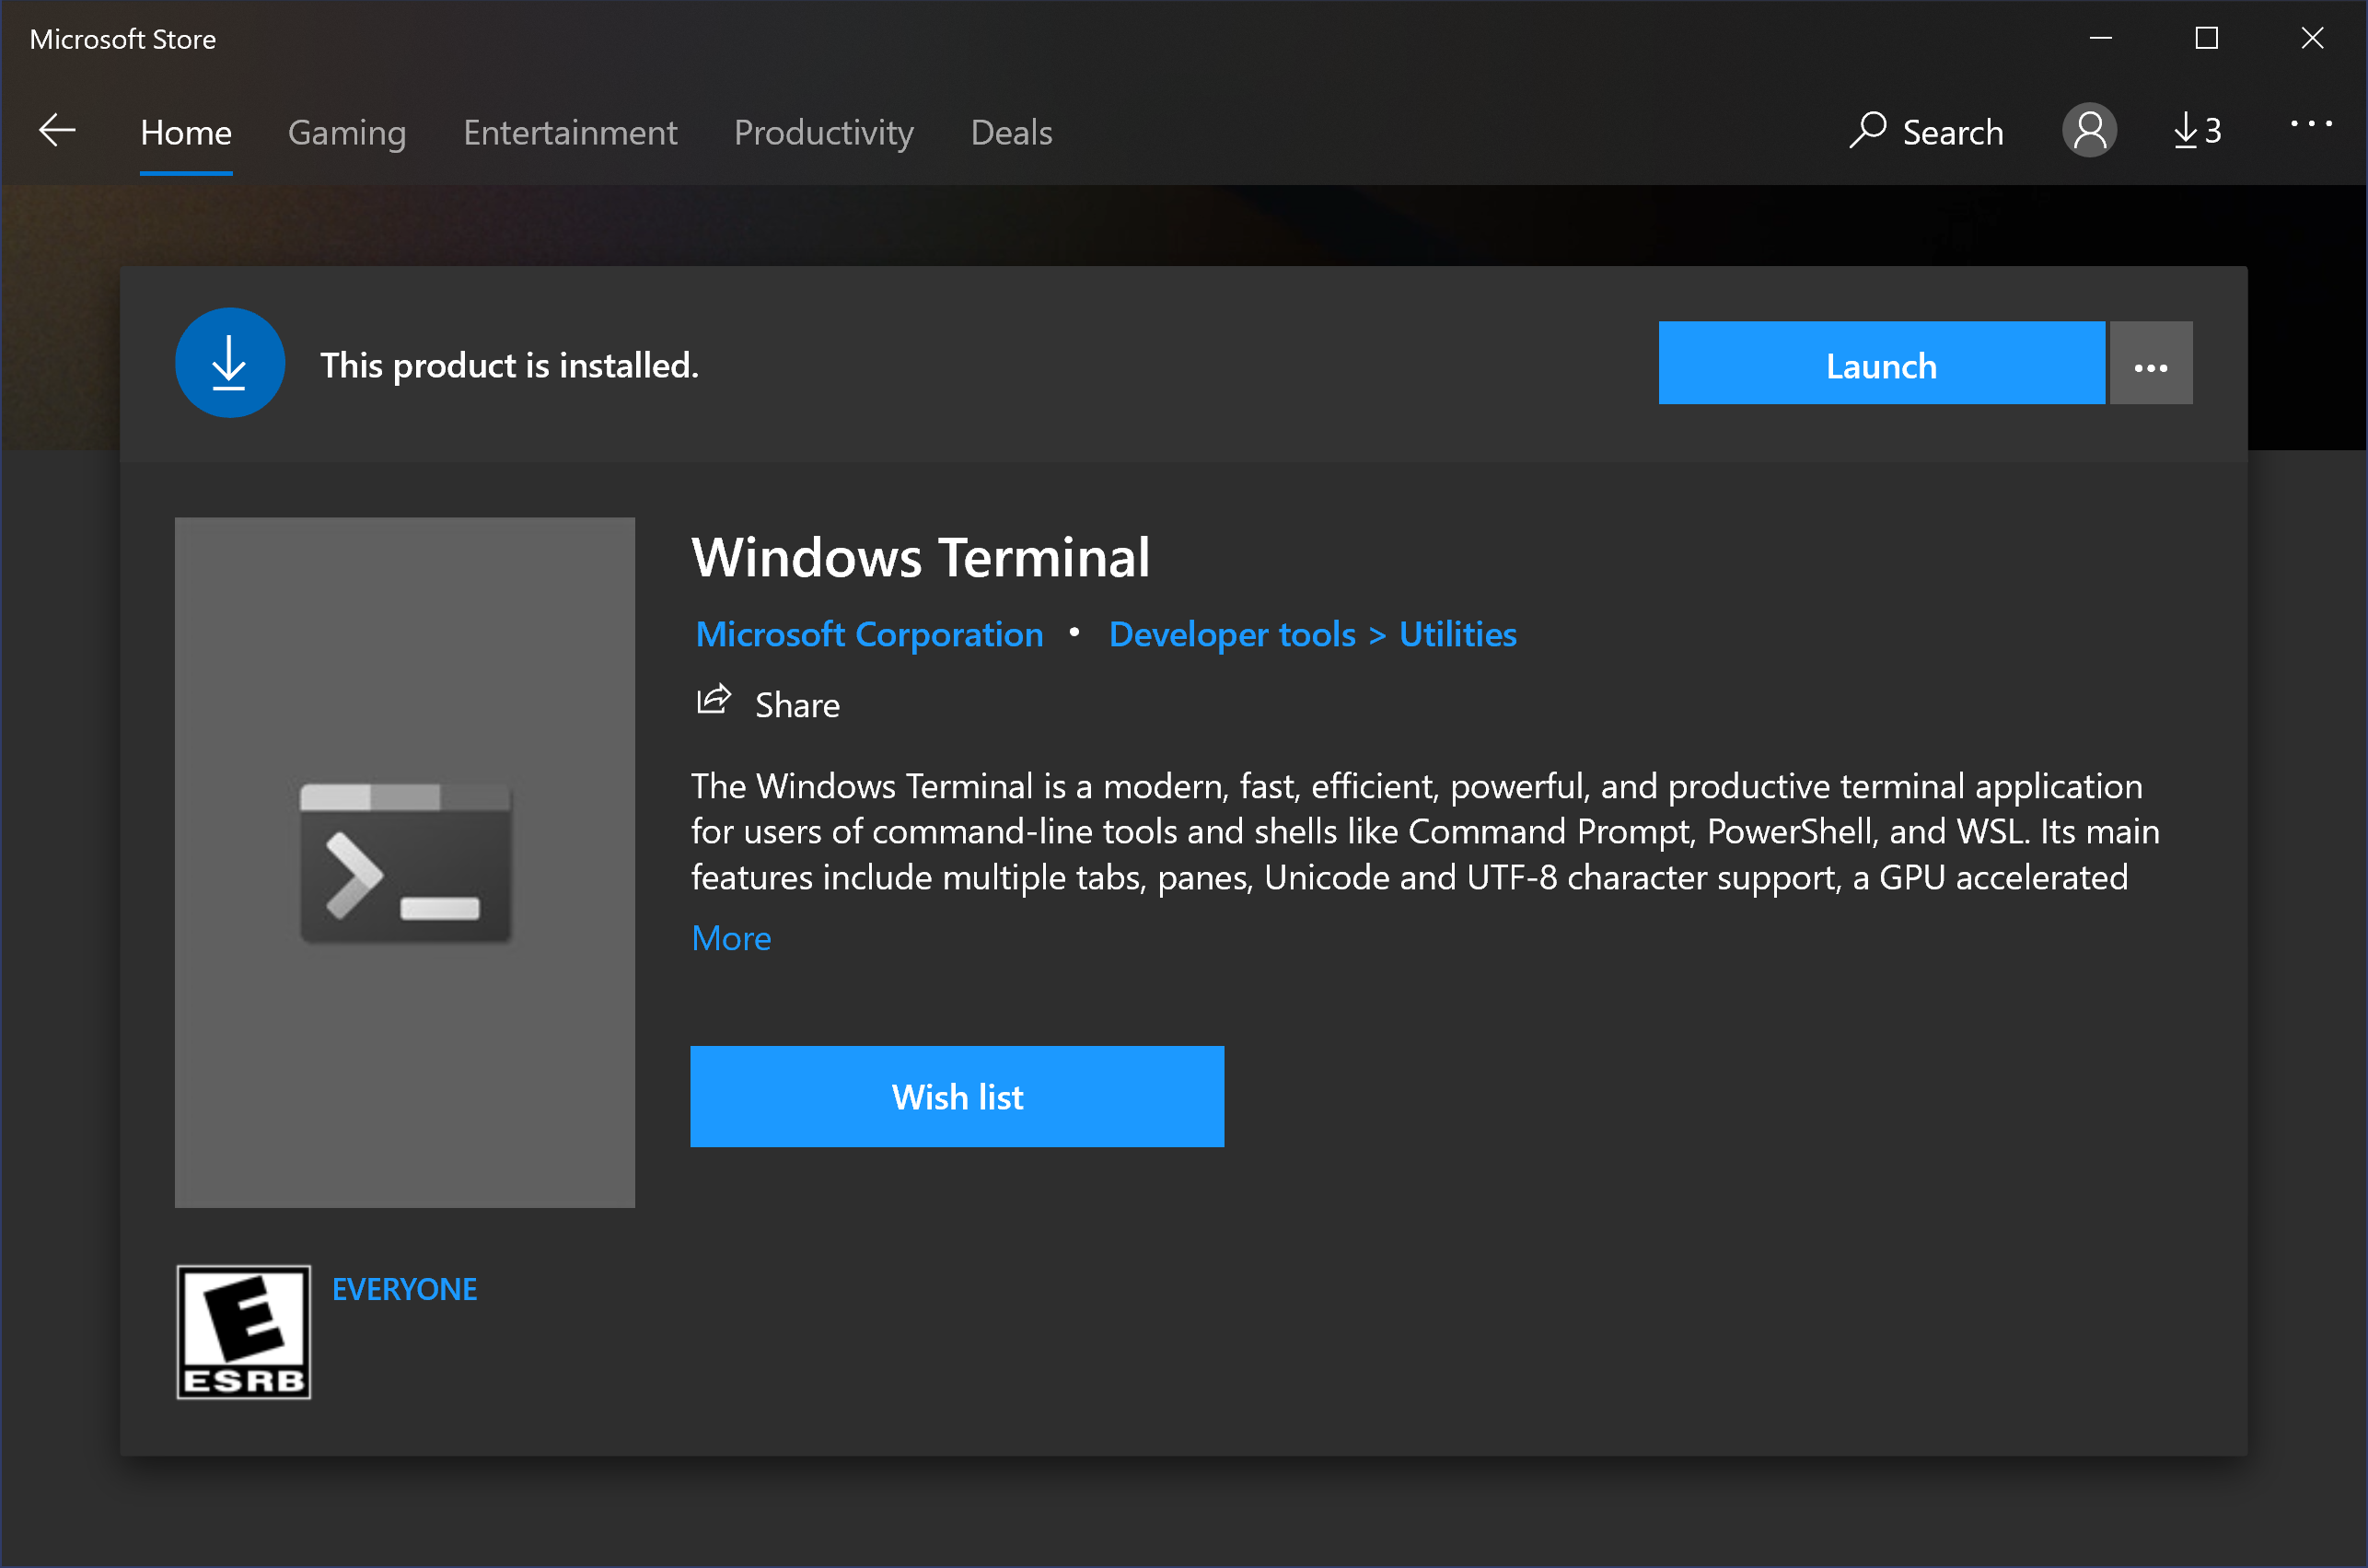
Figure 1. Launch Windows Terminal from Microsoft Store.
By default, Windows Terminal will open a PowerShell tab. You can open tabs of any installed shells by clicking the dropdown as shown in Figure 2.
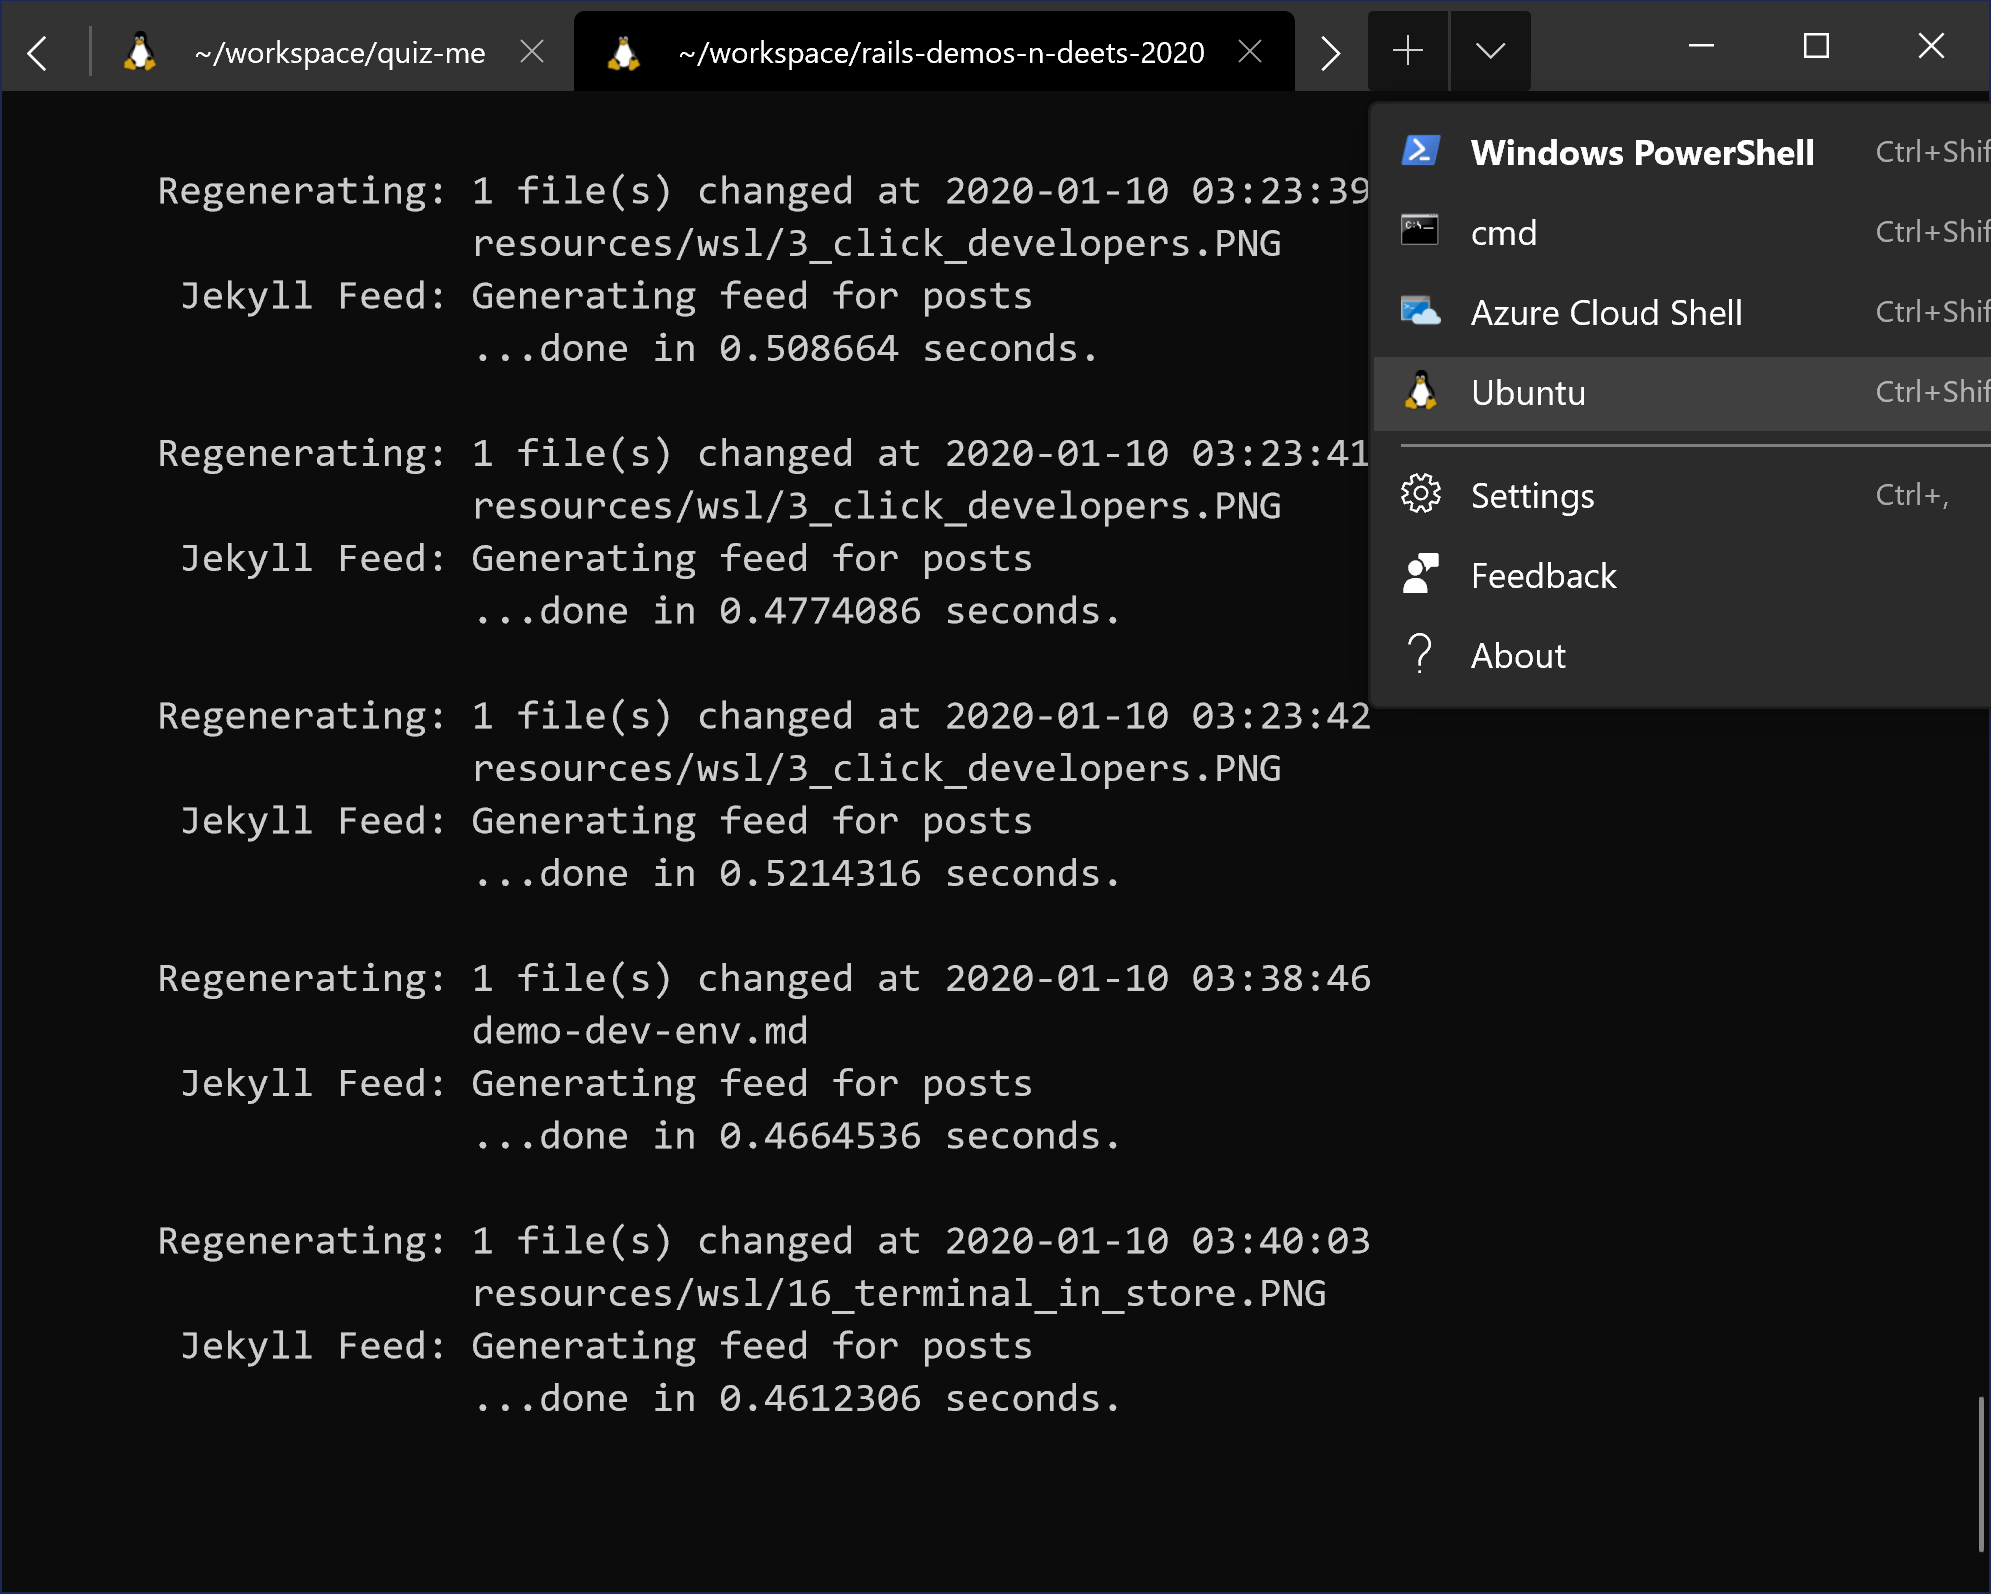
Figure 2. Open a new terminal tab.
Step 2. Install and Set Up Windows Subsystem for Linux with Ubuntu Linux Distribution
-
Open Windows Terminal with administrator privileges:
- Click the dropdown arrow next to the + tab button.
- Right-click Windows PowerShell and click Run as administrator.
-
Enable WSL and install the Ubuntu Linux distribution by running:
wsl --install -d Ubuntu
Expected Output:
Installing: Virtual Machine Platform
Virtual Machine Platform has been installed.
Installing: Windows Subsystem for Linux
Windows Subsystem for Linux has been installed.
Downloading: WSL Kernel
Installing: WSL Kernel
WSL Kernel has been installed.
Downloading: Ubuntu
The requested operation is successful. Changes will not be effective until the system is rebooted.
Troubleshooting:
-
If the installation gets stuck at “Downloading: Ubuntu,” cancel the process with
CTRL-Cand use this alternative command:wsl --install -d Ubuntu --web-download
This approach is detailed in GitHub Issue #9390.
-
-
After successful installation, restart your computer when prompted.
-
Upon reboot, a terminal will open to finalize the Ubuntu setup.
Expected Output:
Installing, this may take a few minutes...
Please create a default UNIX user account. The username does not need to match your Windows username.
Enter new UNIX username:
You will be prompted to create a UNIX user account:
- Enter a username (only lowercase, underscores, and dashes allowed).
- Create and confirm a password.
Troubleshooting:
- If the terminal hangs on “Installing, this may take a few minutes…”, give it a moment. If it still does not proceed, press
CTRL-Cto continue. This should bring up the username prompt (see GitHub Issue #6405).
-
Confirm the successful account creation with output similar to the following:
passwd: password updated successfully
Installation successful!
To run a command as administrator (user "root"), use "sudo <command>".
See "man sudo_root" for details.

Welcome to Ubuntu 24.04 LTS (GNU/Linux 5.10.102.1-microsoft-standard-WSL2 x86_64)

* Documentation:  https://help.ubuntu.com
* Management:     https://landscape.canonical.com
* Support:        https://ubuntu.com/pro

  System information as of Mon Jan 13 13:49:48 CST 2025

  System load:  0.0                Processes:             8
  Usage of /:   0.4% of 250.98GB   Users logged in:       0
  Memory usage: 0%                 IPv4 address for eth0: 172.19.241.180
  Swap usage:   0%

This message is shown once once a day. To disable it please create the
/home/kbridson/.hushlogin file.
kbridson@DESKTOP-RG82GUI:~$
Most of that output is the default Ubuntu message of the day which you can generally ignore.
The last line is your Ubuntu terminal prompt. It should begin with the name you specified as your Unix account username.
Troubleshooting: If your terminal prompt (the last line of the output) begins with
rootinstead of your chosen username, you may need to:- Create a user account manually and set it as the default account. Refer to this guide.
- Grant the new account
sudoaccess as detailed in this article. - Open a new Ubuntu terminal tab to confirm that you are logged in as the new user by default.
Step 3. Update Ubuntu Packages
After the Ubuntu installation is complete, it is a good idea to update the packages that came preinstalled, because new versions may have been released since the Ubuntu install image was created.
-
Open a new Ubuntu tab in Windows Terminal.
-
Update the package list by running the command:
sudo apt update
-
Upgrade outdated packages by running the command:
sudo apt upgrade
When prompted to continue, type
y.Important: Do not follow any steps to upgrade to the next Ubuntu version if prompted.
4. Conclusion
By completing the above steps, we have now installed a Unix-like development environment on our Windows system along with a terminal app to interface with it.
Go back to the Development Environment demo and continue from Section 1.